Wednesday, September 19, 2018

Interleave Fun!

Hi Bloggers!

It's Blogger's Quilt Festival, so it's time for my annual blog post :) Life has been busy but I did have a bit of time to quilt last spring. This quilt has a fun origin story.  Sometime last year, my mother in law came over and asked me if I knew of any good quilt shops.  I told her I did and she said she wanted to go see if any of them were selling any of the quilts they had on display.  I was like, "Umm....I can make you a quilt."  Bless her heart, she gave me carte blanche on basically everything about this quilt (as well as a nice little check so I could go buy fabric) :)


I had recently been looking online at interleave quilts by Lorrie Cranor.  She has some instructions for how to make some fun little ones out of fat quarters.  I tried that out, figured out some techniques that would scale a little better for me, designed it in inkscape, redesigned it in inkscape a few more times, finally found a design I liked, made a few mock-ups and started sewing.  


This was a serious labor of love and it took a bit longer than I anticipated to put it together.  I though it would be easier since it's technically a quilt as you go with all straight lines and I didn't have to figure out how to finish/quilt it.  But putting that much bulk through my machine (even with its bigger-than-average throat size) got to be a little bit of a wrestling match at times.  


This is a full size quilt and measures approximately 80 x 86.  There are somewhere in the neighborhood of 172 or 173 strips altogether---each 1/2 inch finished.  And, as you can see if you look closely, this quilt was constructed with all straight lines.  Any curves you see are an optical illusion.  Cool, huh?


Thanks for letting me share my quilt with you!  Hope you're all enjoying all the amazing Blogger's Quilt Festival quilts!


mail


Friday, September 22, 2017

My First-Ever I-spy quilt.

As I was photographing my Hexagon I-spy Quilt so I could add it to the Bloggers Quilt Festival, I realized that I never took a picture of the first I-spy quilt I ever made.

My first-ever I-spy quilt!

When I made this one, I was a fairly new quilter.  I did some swaps and got a bunch of fabric of questionable quality (that was before I found the ISpyQuilts group on yahoo--they only swap quilt shop quality fabrics).  Since I was a new-ish quilter, I wasn't super experienced at weeding out cheap fabric by feel...so I'm hoping all the fabric I included will stand the test of time. But if not, oh well....I'll enjoy it while it lasts!


In planning this quilt, I looked at a bunch of pictures of I-spy quilts online, found a style I liked, and set to work.  It went together pretty easily.  My cute sister quilted it for me on her long-arm machine.

Honestly, the backing/binding is what makes this quilt for me.  I LOVE LOVE LOVE this fabric (and if anybody knows what it's called and where I can buy more of it, please let me know).


Hope you're all enjoying the festival!

Hexagon I-spy!

Happy Bloggers' Quilt Festival!  When I first started this blog, it was so I could show off my quilts for BQF.  I haven't posted anything for a couple of years (the more kids I have, the less I quilt) but I was SO EXCITED for the return of the old format (and the randomized prizes instead of popularity-contest prizes) that I decided to go take a few pictures.

My Hexagon I-spy quilt!!!

This little baby was a serious labor of love--It was also my nesting project.  I pieced the top last summer when I was pregnant with my now-1-year-old.  When some people are nesting, they clean and organize things....when I'm nesting, I quilt. :)  I got the majority of the I-spy pieces from an awesome swap group I'm a part of (a yahoo group called ISpyQuilts, if you're curious).

The pieces for that swap were 4" squares, which I cut down with a hexagon template I talked my husband in to machining for me on his mill.  Then, when I started laying all the hexis out, I got the brilliant idea to add hexagonal sashing....so I did some more talking and wrangled a non-regular hexagon from the machinist husband.


And then I sewed.....and sewed.....and sewed.  As you can see, this quilt has about a billion Y-seams. Thank heavens for my new sewing machine that does neat tricks like raising and lowering the presser foot when I tap the foot pedal and cutting the thread with the push of a button.


I try to make the backs of my I-spy quilts fun and somewhat related to the tops....I couldn't find any hexagon fabric I loved...but I found this stuff that was supposedly ice cubes that looked hexagonal enough for me.


When I got done piecing the top, I was SO DONE with looking at and working with this quilt.  My amazing and very talented sister was kind enough to take pity on me and quilted it on her long-arm to help me get it finished up.

I love I-spy quilts.  I have two of them on my bed (I know! Originally, I thought I'd let the kids put them on their beds but I love them too much to let them go!)  I just love how colorful and interesting and fun they are.  I have another one in progress....I'm hoping to have it done for the next Bloggers Quilt Festival!


Thursday, May 21, 2015

Bloggers' Quilt Festival time (or...How do I write a blog post, again?)

Did you get what I did there? Alternate titles a la Rocky and Bulwinkle?  Yeah....it's been sooooo long since I've made a quilt and posted it that I forgot how to even post to my blog.  This quilt is my latest project.  It's for a new baby I'm related to but still haven't met.

Originally, I was planning to do something kinda like this Cynthia Muir original (but with just plain blocks of color).  I had all the blue and green squares made when it occurred to me that I actually didn't have enough of the white I was using to do what I had in mind (I was just using some random white from my stash...and we all know how fun (not) it is to try to match a random white).

Anyway...so I just shimmied on down to the fabric store and bought some yellow to add in to the mix.  I sewed a whole bunch of yellow squares to go with the others and set them in a pile.  A few days later, I went to lay them all out to see what kind of pattern I'd like and went, "Oh-oh!"  I had made all the yellow squares 1/2 inch smaller than the other squares.  So...I wracked my brains for about 5 minutes, tried unsuccessfully to call my sister for advise, and then hit upon this BRILLIANT (if I do say so myself) salvage job.  If you didn't know better, you might think I'd actually planned it this way!  Yay!


Hope you're all enjoying the Bloggers Quilt Festival!


AmysCreativeSide.com

Sunday, May 18, 2014

Bloggers' Quilt Festival--Rainbow Pillows

Happy Bloggers' Quilt Festival!  I've been meaning to post pictures of these pillows for...oh, about 2 years now.  I made them for my mom for Mother's Day in 2012.  The fabric for these was left over from the rainbow quilt my sister and I made our mom from the Summers End quilt kit.  I figured having throw pillows that matched the quilt would be kind of fun and set to work.  And here are the results!


This was also my first time since 9th grade sewing to put in invisible zippers.  After a few false starts, they turned out very well.


I hope you're all enjoying the Festival!


AmysCreativeSide.com

Saturday, May 17, 2014

Bloggers' Quilt Festival: Circles!

Yay! It's Bloggers' Quilt Festival again!  And here's my quilt to show you...Circles!  :D


My quilting has slowed to a crawl these days.  Since I gave away all that fabric last October, the pressure to produce has vanished.  I never did post about getting rid of all of that, did I? Ok...here's a picture of the boxes of cheapy fabric I got rid of.


Since I'm not feeling obligated to quilt my way through those boxes of junk fabric, I've been reading books and playing on the internet a lot more in the evenings instead of quilting. Sometimes I try to quilt during the day, but when I'm quilting, my children feel neglected and start acting up and it's just not much fun to quilt to the sound of screaming and fighting.  I did manage, though, to make this circle quilt last winter to give to a new niece.


I thought for a long time about what kind of quilt to make for the new arrival.  And once she was born and named, I felt like whatever quilt I made should at least somewhat match her personality (as much as you can determine a newborn's personality from a picture).  I'd been wanting to try a circle quilt for a while so I pulled out some fabric that I thought matched the baby and looked cute together and started sewing.  When I got it done, I realized that I had used pretty much the exact same color scheme as I used for her older sister's baby quilt. Remember this one?


So, there you have it! My first attempt at a circle quilt!  I was THRILLED with how it turned out.  I think it's probably the cutest quilt I've made yet.  I quilted it in the ditch along all the squares and around each of the circles, then packaged it off and shipped it to my cute little niece.


Hope you're enjoying the Bloggers' Quilt Festival!


AmysCreativeSide.com

Wednesday, October 30, 2013

Bloggers' Quilt Festival! Funhouse Quilt


It's Bloggers' Quilt Festival again!  I can't believe the time has passed so quickly since the last one.  My entry this time is my "Funhouse Quilt."


This quilt has an awesome history.  When I very first started quilting, my mother-in-law lent me a book called The It's Okay If You Sit On My Quilt Book (here is the updated version of the book I read).  In a nutshell, this book teaches you how to look at a block or quilt and figure out how it's constructed...and then do it easier.  So what did I do?  I found a really cool looking block that was in the book...and then did it harder!  I was messing around with EQ5 and drew it up and then found myself rotary cutting funky angles and sewing seven million set-in seams (without knowing they were set-in seams or that set-in seams were supposed to be hard).  This was also before I really grasped the concept of a 1/4" seam.  I just sewed with the fabric aligned with the edge of the presser-foot.  This wouldn't have been a problem at all...except for a few things.  The tedium of putting this baby together was getting to me, so I put it in a drawer and took a little break (read: 4 years).

Meanwhile, I got rid of the sewing machine I had been using and started using a different one.  Can you see where this is going?  Yes...when I got done, I had a bunch of different sizes of finished blocks...(because I'm not a perfect quilter, I didn't even have two different sizes, I had a range of sizes...some around 10.5 inches, some around 10.25 inches, some around 10.75 inches).  Yikes!  So I had to use the little trick I developed on this quilt, where I measured and then marked each side of each block with a colored pin according to its' dimensions (big, medium, or small) and then tried my best to match them up.  When it was all done, it made my eyes do weird things (lots of not-square squares and things mess with my head...kind of like a funhouse mirror)---and THAT is why it's called the Funhouse Quilt.

When I got it all done late last summer, I begged my amazing sister to quilt it for me.  Luckily, she took pity on my poor pregnant-and-nesting soul and quilted it for me.  I'm thrilled with what she came up with. The backing is dark blue minky and the quilting looks as good on the back as it does on the front.

 Swirls and flowers...SO cute!


A few weeks before my baby was due, I got a lovely package in the mail from my sister with this quilt (and a few others and some super-fun birthday surprises) inside.  I got to work and machine-sewed the binding on to quilt and then decided to hand-finish it.  I'll probably never get rid of this quilt because I worked on it while I was sort of in labor with my baby.  I say sort of because I woke up to pressure waves (contractions) and went out in to the living room to sit on my birth ball and zone out (I do Hypnobabies).  But NOTHING was happening, so I started sewing the binding.  I did that for a few hours, had a conversation with my husband about buying some equipment, then went back to bed. Later that day, we had our new addition.  Don't worry, between nursing the baby and wrangling the older kids it only took me two and a half more months to finish getting the binding all the way done.  To celebrate, we decided to go to the park and take some pictures!


Hope you're enjoying the quilt festival!!!
 Blogger's Quilt Festival - AmysCreativeSide.com

Sunday, September 1, 2013

I'm at it again!

I think making quilts for Project Linus might be an addiction.  Even when I don't really intend to do it, I end up doing it anyway.  This time, I was acting out of guilt.  See, a long time ago, someone donated some AWESOME blue and turquoise fabric to our local Project Linus chapter.  This fabric was passed along to me to turn in to something amazing.  I've been looking at it trying to decide what to do with it for, um, probably 4 years now.

Then, while browsing the last Bloggers' Quilt Festival photos, I found the perfect pattern.  It's a paper piecing pattern by Sassafrass Lane Designs called Lombard Street.  The problem was, it was such a huge pain in the tail and looked SO good when I got done that I didn't want to give it away.  Instead, I just decided to trade a yard of QSQ fabric from my stash and make another (smaller) paper-pieced quilt to donate.  So this is what some lucky kiddo is getting.


The one with the awesome blue and turquoise fabric is still waiting to be quilted and bound.  I'm planning to put cuddle fleece on it like I did with this one.  I just ordered more 505 Spray Adhesive (very important, see below).


I decided to do a scrappy binding and (even though I'm historically not a huge fan of scrappy bindings) I think it turned out pretty well.  I sewed around the outsides of all the triangles with my sewing machine.  There's no batting in this quilt...just minky on the back, so it's light and summery.

And then, with the leftovers from the triangle quilt, I made this:


See how fabric-sheary and bubbly it looks?  Yeah, THAT is what happens when you use cuddle fleece on the back of a quilt and don't use spray adhesive to stick the layers together first.  Ohhh well.  Live and learn.


Friday, May 17, 2013

Blogger's Quilt Festival: Out of hiding...

I'm coming out of blogger hiding again for the Blogger's Quilt Festival.  Sad that it takes the remote chance of willing a prize to get me to post, huh?.  But in my defense, I have been busy since the last festival...being pregnant, having the flu while pregnant, having a ruptured eardrum, recovering, having a baby, nursing said baby...I also quilted like CRAZY to get some UFOs done and sent to my amazing sister to quilt on her long-arm.  Now I just need to get them bound and photographed so I can show them off properly.

Between all the winter illness and the arrival of our new little cutie (whom I am now feeding while typing this one-handed), I got a lovely little package in the mail...a bunch of my quilts, beautifully quilted and ready to be bound.  I made this quilt to test a pattern for my sister.  In return, she agreed to quilt it for me (she did all the others out of pure sisterly love and awesomeness).  I backed this quilt with minky and was THRILLED with how it turned out.  I gave it to one of my sisters-in-law as a baby present but it was super hard not to keep it for myself!
 

And there you have it.  I tried really hard to get good photos of the quilting but, alas, my photography skills and camera were not up to the challenge.


Enjoy the festival!


AmysCreativeSide.com

Wednesday, October 31, 2012

Bloggers' Quilt Festival: Branching out

Happy Bloggers' Quilt Festival!

This is a little quilt I whipped up using some chenille my friend gave me.  There's a LOT more chenille where this came from, so I'm slowly working my way through it.  I decided to branch out and put some fabrics together that I normally wouldn't.  And I have to say, it turned out MUCH cuter than I thought it would.  This quilt is probably headed for Project Linus...hope some little girl enjoys it!


I only used fabric from my stash on this one and was thrilled at how well the backing and chenille (and yellow dotty and pink striped stuff) all tied together.


Blogger’s Quilt Festival Stats
Finished quilt measures : 41″x 48″
Special techniques used : the quick and dirty sew it and quilt it all at once method :D
Quilted by : Allison
Best Category : Baby quilt


Thanks for visiting!  Hope you enjoy the Festival!


Amy's Creative Side


Friday, October 19, 2012

My first fun with "thangles"

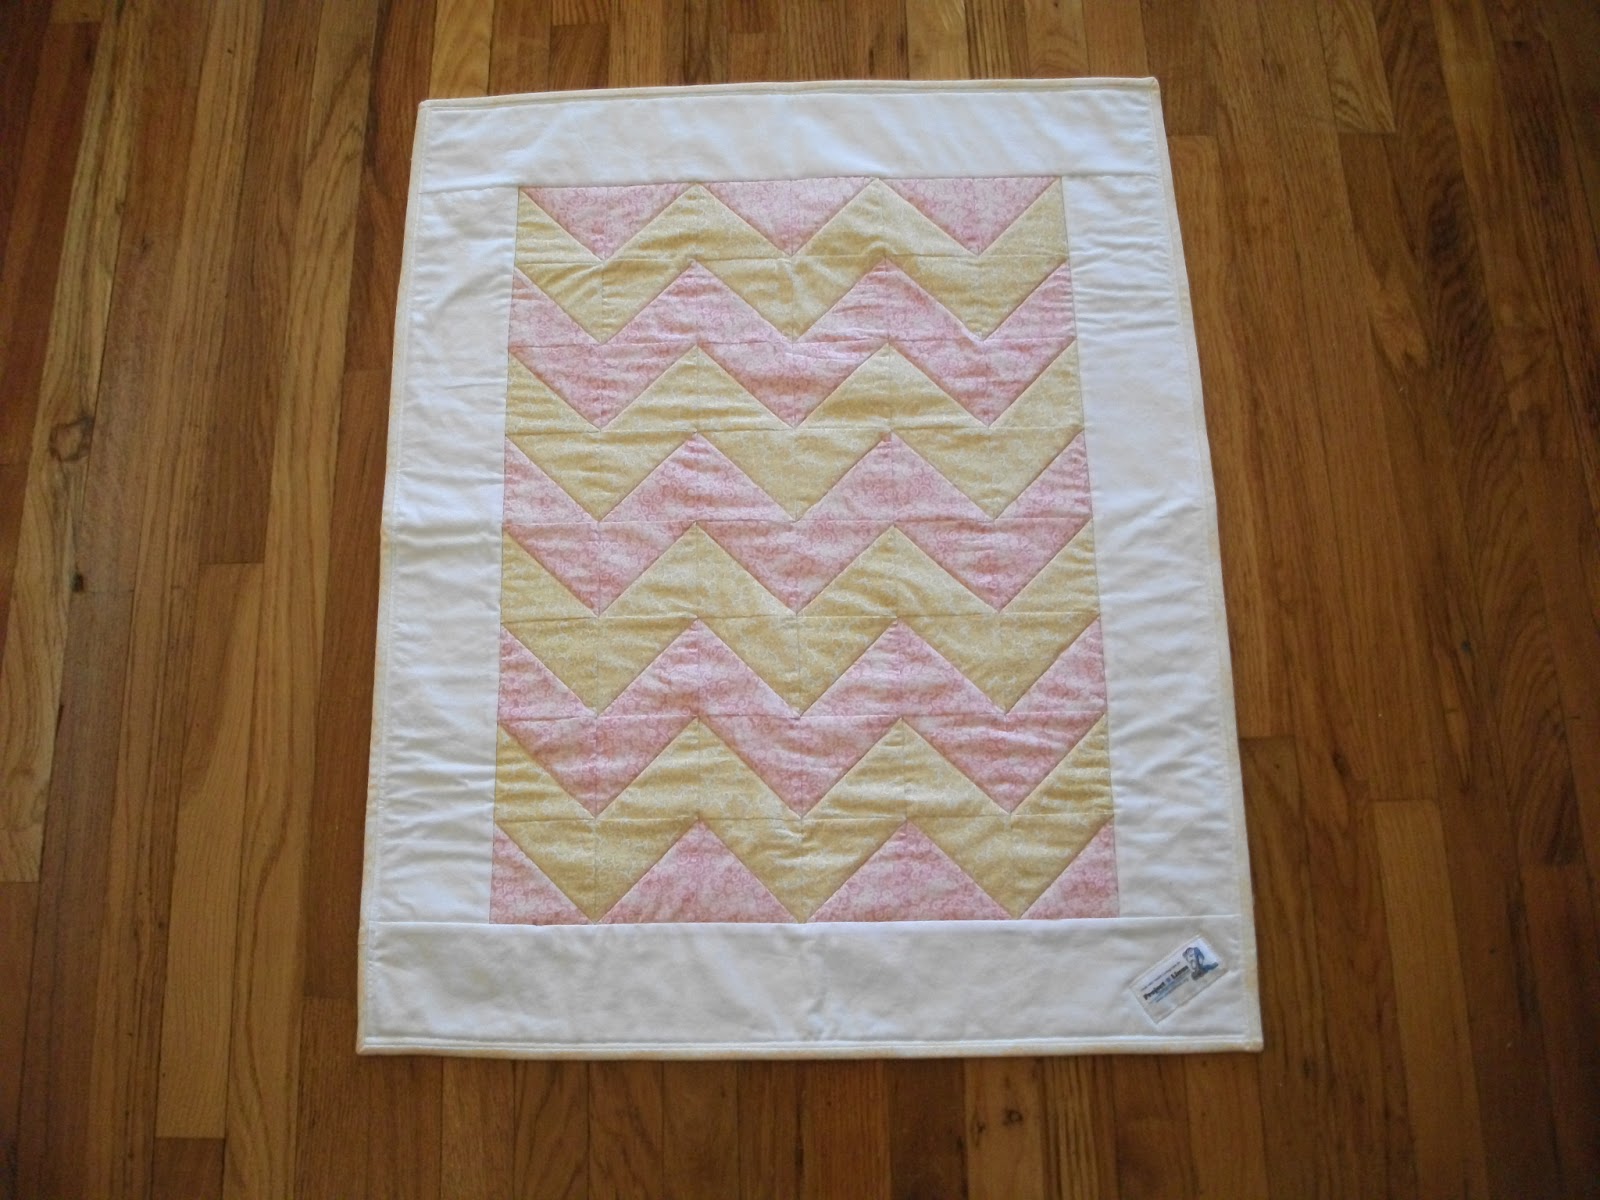
I have this thing about using up small-ish amounts of fabric (especially fabric that isn't mine).  I think the pink and yellow was donated to our Project Linus chapter...not sure...doesn't really matter. At any rate, I had some leftovers from another project a long time ago and this is what I decided to do with it (it looked much cooler before it sat folded up on my sewing table for 6 months).  It was my first-ever use of "thangles," despite the fact that they've been sitting in my drawer for a few years now (and my cute sister gave me a Triangulations CD, which is basically the same concept but printable from your computer, years before that).  I have to admit, I found it very amusing to sew them.  And, it made me want to paper-piece something in the near future.

This quilt looks MUCH better in person than it does in photos.  Maybe it's because I just threw it on the floor and couch and snapped some quick shots? :)


Monday, October 15, 2012

Better late than never :D

Ok, wow.  So, it's been a really really long time since I last posted.  I have a bunch of quilts I want to get out from under foot and/or off of my teeny tiny sewing table....so I figured I'd better start posting!  Here is the first of them.

 This is the quilt I just made for my new(-ish) nephew (who is probably crawling by now).  
Better late than never, though, right?  

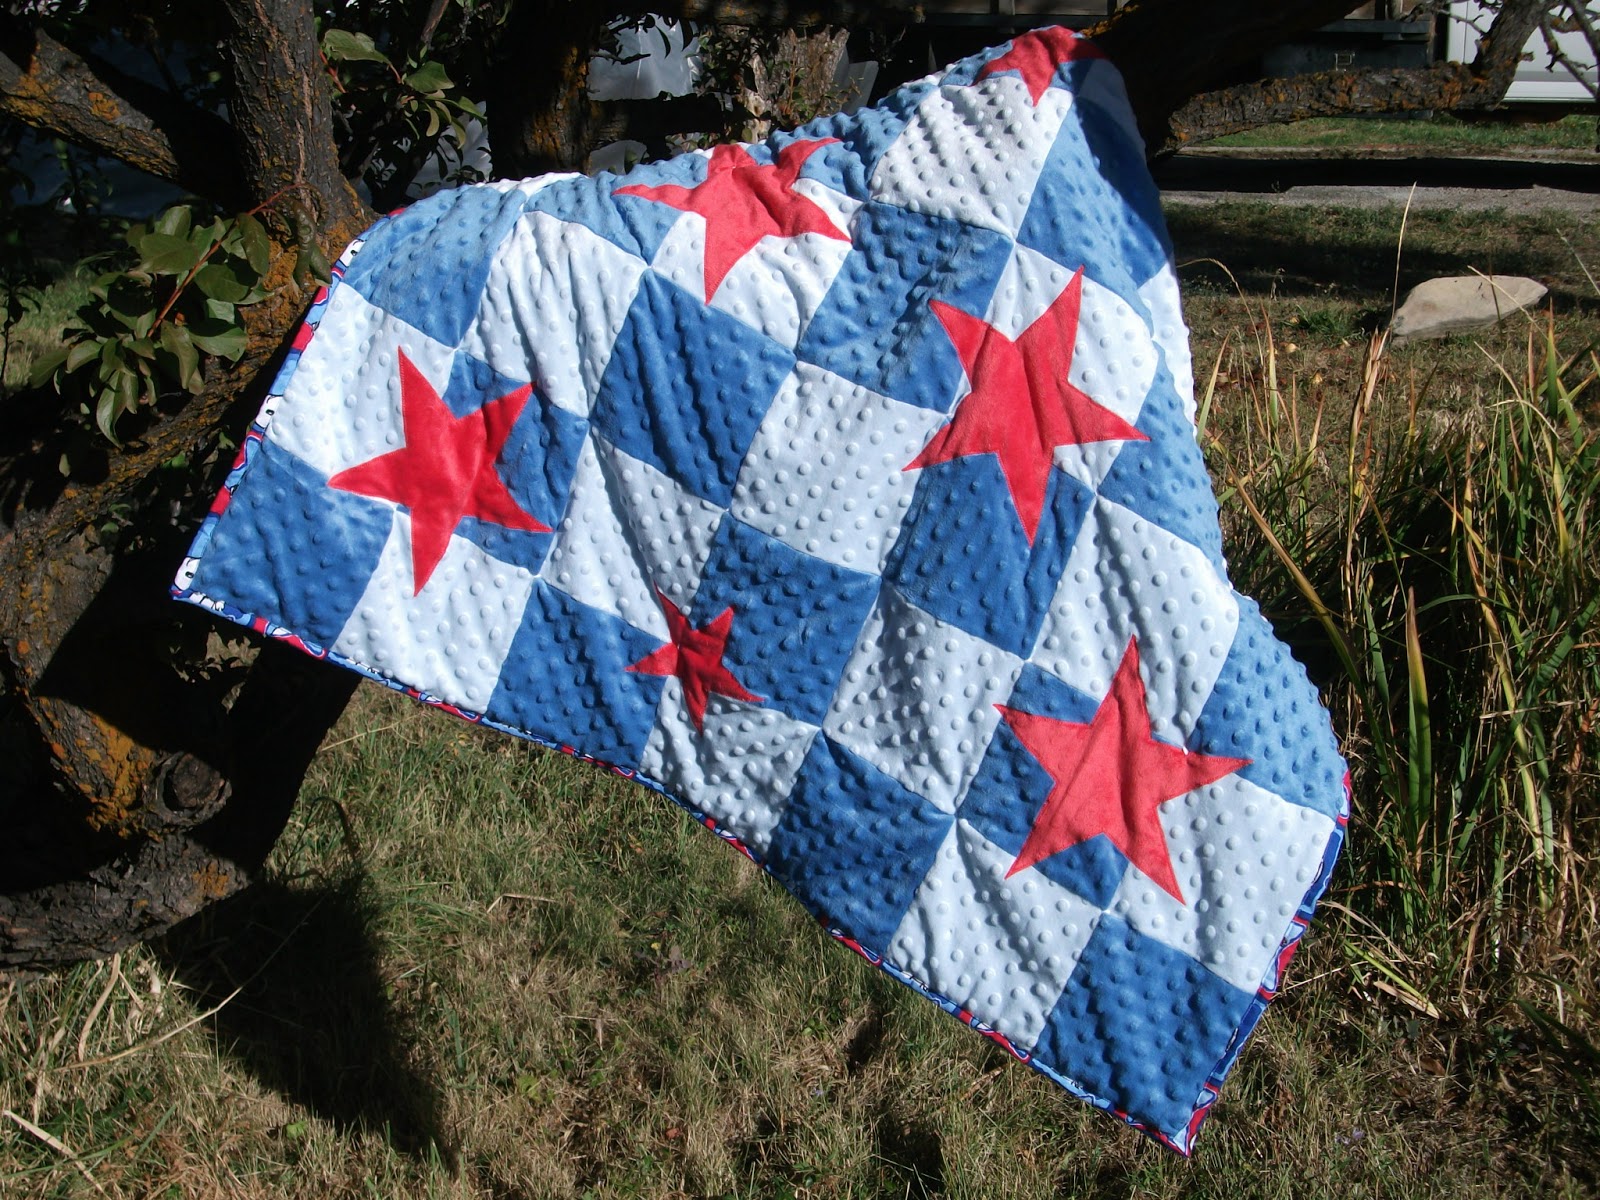
Before making this quilt, I had never attempted to piece minky.  It was, shall we say, interesting.  After I sewed my rectangles in to rows, I thought, "What's the big deal with minky? This isn't THAT bad to sew."  Yeah...then I sewed the rows together and I understood.  S-t-r-e-a-t-c-h-y.  Yikes.  My walking foot kept freaking out and skipping stitches (though that may have been a machine-cleaning and maintenance issue).  
 
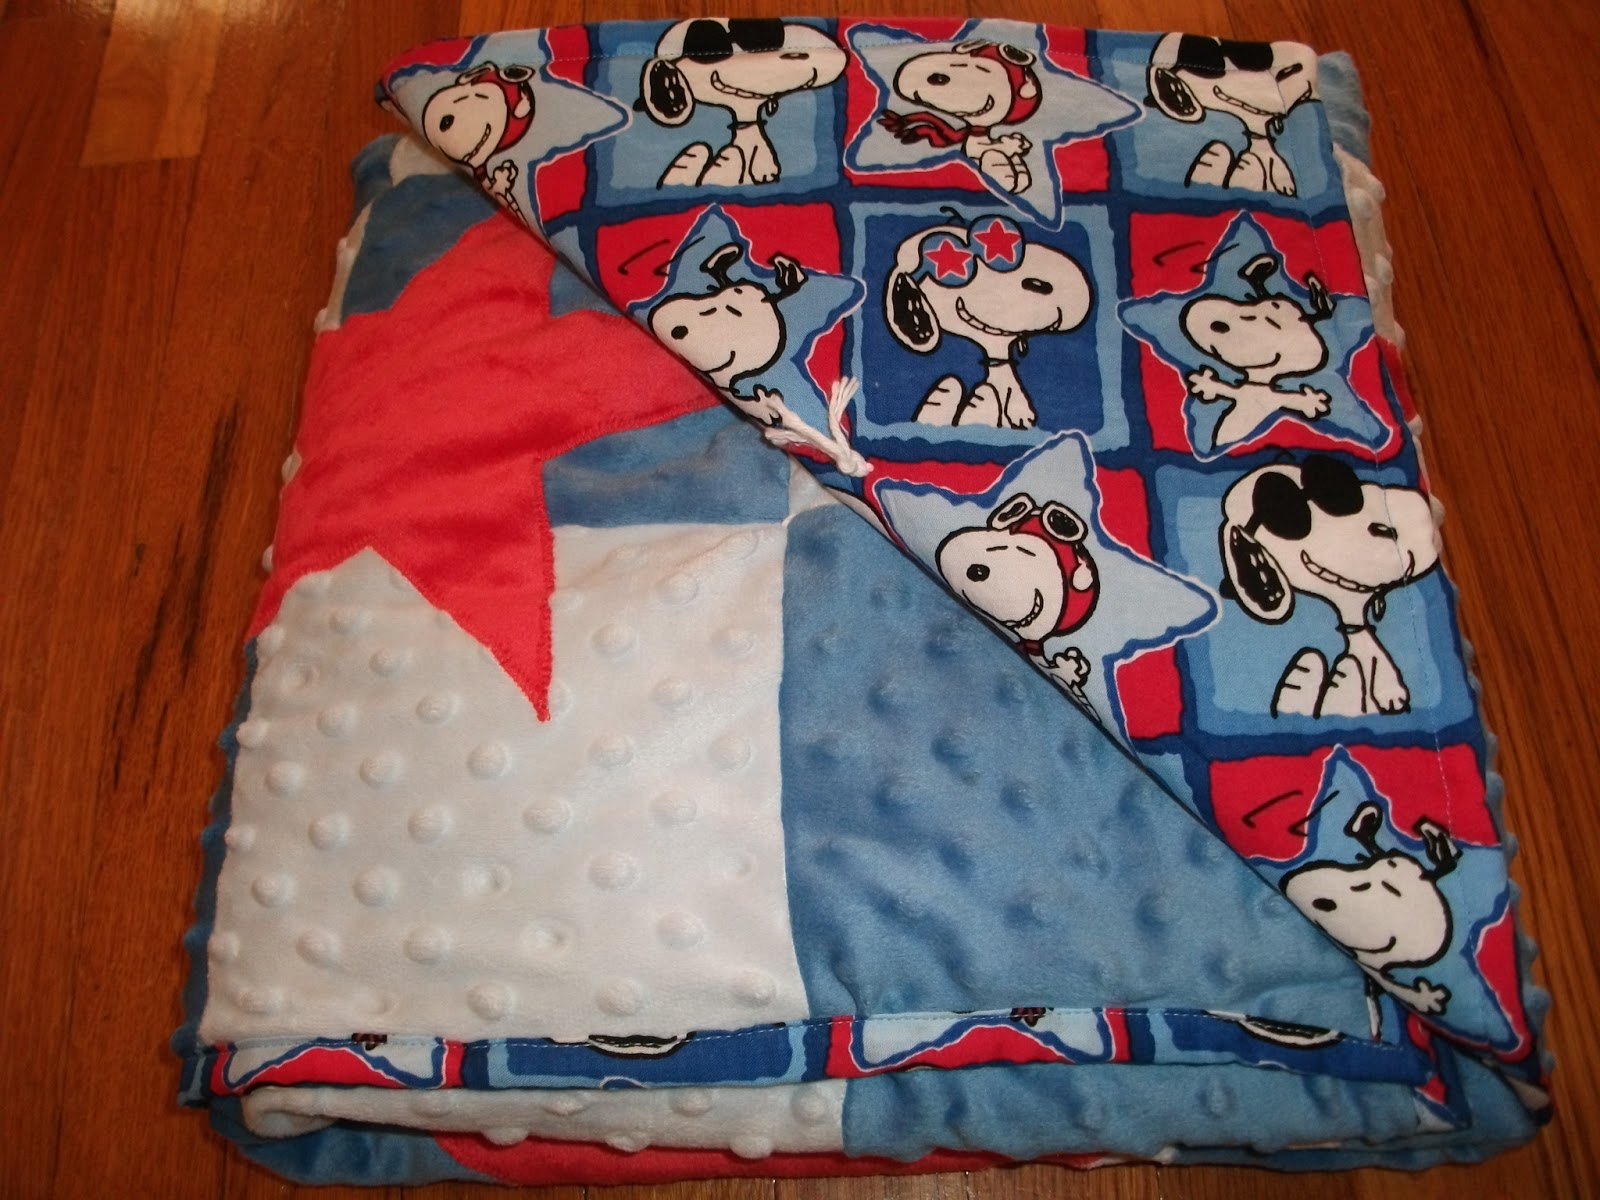
In the end, it all turned out okay and I even had some fun adding some applique stars which happened to match the backing perfectly.

I made the stars out of ironed bumpy minky (which I guess would just make it minky, then, huh?)  Anyway...mostly I ironed it because I was curious about exactly why one quilt shop I visited about five years ago had a billion signs around their store that said DO NOT IRON BUMPY MINKY.  And you know how I am...I've though about those signs every time I've encountered minky for the past five years.  And then...I ironed it!  It ended up working out splendidly for my application.

 And I really love how the red stars tie the minky side together with the backing.


Sunday, July 15, 2012

My kitchen curtains--Before and After

One of my little sisters got me interested in Before-and-After furniture refinishing blogs last summer.  And while I still have no big plans to refinish any dressers or curio cabinets any time in the near future (and forgot to take a before picture of grandma's bench that we're slowly working on sprucing up)...I DID take before and after pictures of my kitchen curtains.

After we got married, I moved in with my husband.  The curtains that were in the kitchen weren't quite my cup of tea, so I headed on down to Walmart and spent $7 on these little babies.  I was soooo worried that my after all my efforts, my curtain choice wouldn't be ok with my new husband (after all, the curtains I took down belonged to his mother).  Ha! I shouldn't have worried.  He didn't even notice I'd changed them until I pointed it out. 

  Before.  Sorry for the angle, here.  But before pictures are supposed to look bad, right? ;)  Note how the curtains aren't even long enough for the window.

After a good, long life of almost 7 years, I decided the Walmart curtains were ready to move out into the garage.  To be replaced by...Blue and white stripes! (That way, they would still coordinate with all the red stuff I have for my kitchen).  Unfortunately, or fortunately, depending on how you look at it, there was nothing even remotely striped in the premade curtain section of any store I checked, so I decided to just make them myself. I had a heck of a time finding material (I was looking in January so there were lots of pinks and reds and hearts for Valentine's but very little in the way of blue and white stripes).  I eventually did find this fabric (which I do not know the name or designer of because that's just one more thing to have to remember and think about and it's not really that important to me...something about a lakehouse maybe?) at Pine Needles in Gardner Village.  I only mention that because Gardner Village has a pond with ducks.  And little kids who are being dragged from fabric store to fabric store in search of the elusive blue and white stripe in the middle of January really really like watching ducks.


 After:  my new blue and white stripey curtains!  Love them to bits!


Incidentally, if my kitchen actually looked this good all the time, it would be truly amazing.  Of course, that would probably also mean that we never use it...or that I had a maid.  Hmmm...a maid might be nice.  More time to quilt. :)

Tuesday, June 19, 2012

What I did with my leftovers

Okay.  I have a whole list of things I need to post on my blog and get off my to-do list (and out of my head).  I've been procrastinating even starting this but I have no idea why...it's not like it takes that long to make a blog post.  I have the pictures all ready to go and everything.  Anyway...after I got done with the 3-D quilt, it occurred to me that I couldn't very well give a blanket to the baby without giving one to big sister.  Also, I seem to have an aversion to scraps.  It's like somewhere in the back of my mind I know they're sitting there waiting for me to sew them in to something creative and magnificent.  Sometimes, I just throw them away so I don't have to worry about it any more.  So before the binding was even on the 3-D quilt, I was trying to cook up how to use the leftovers it created.  And here's what I came up with.


I wish I would have had enough fabric left to do something cool on the corners, but when it was all said and done, all I had left was a little piece of black.  How's that for cutting it close?  :)